|
|||
|
|||
|
|
|||
|
|||
Hints and Things does not use any 1st Party cookies - more information .
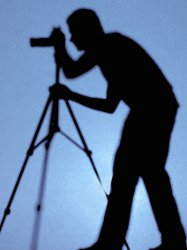
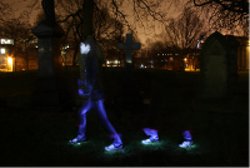
Children's Light PaintingI’m sure all children and even many adults have at some point been given a flash light or maybe a sparkler and tried to make shapes or words by moving it around so fast that it tricks the eye into seeing a solid line. Well there is a really simple photography technique that allows you to capture these words and illustrations, it’s known as light painting and with a bit of practice you can easily produce some extremely effective results. What you need: Camera: The camera does not need to be particularly fancy but you do have to be able to manually adjust the exposure time. The ability to instantly see results means a digital camera will be easiest whilst practicing, but the technique will work equally well with a film camera.
Almost all different camera types and brands are changed in different ways so if you are not already familiar with how to change the manual settings on your camera you may need to consult the manual or a website dedicated to your brand of camera. Digital SLR Cameras are the easiest to control manual settings on, but many compact digital cameras allow this too. The most important thing to control for taking these images is the Shutter speed. This is the amount of time the lens lets in light. To change the shutter speed your camera will need to be set either in Manual mode, often represented with an M. Alternatively you can set your camera in Shutter Speed Priority mode often represented with an S. How long your exposure time needs to be depends on how complicated your design is and how long it will take. 45 seconds might be a good starting point but it really depends on you. With some cameras you can set the length of
time to Bulb which means the shutter will stay open for as long as you hold
the Shutter release this will give you the most flexibility but means the
person taking the picture can’t also be in it. The flash should usually be suppressed whilst taking the picture, although some interesting effects can be created using it during very long exposures, but to begin with turn it off. The camera needs to be perfectly still whilst the picture is being taken, when the lens is open for a long time any camera movement will result in your photographs becoming majorly blurred. Therefore you cannot hold the camera you need a tripod or flat surface to leave the camera on. It is also important that you take extra care not to move the camera as you press the shutter release. If you have a remote control for your camera now would be an ideal time to use it. If you don’t but are struggling with camera blur, you can set your camera to self timer so that you are not touching the camera as the photograph takes. Framing the picture: When framing the picture it’s important to make sure there is as little light as possible, all light will be exaggerated in the image, resultantly any lamps or lights in the background will become very bright and large often taking over the whole picture. Choose a location that is dark as possible and position the camera so any lights that you cannot turn off are not in the frame. Make the frame as large as possible; you
cannot always judge where your drawing will go, you can always crop the
image later. To get an idea of what will appear in the picture you may wish
to try taking a photo with the flash as a test before hand. Depending on what effect you hope to achieve there are different ways to do this, with practice I’m sure you’ll even come up with your own techniques.
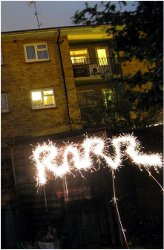
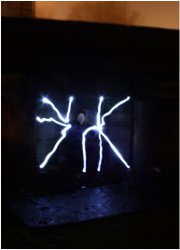
Draw it big, the slower you are and shorter the exposure the thicker the lines will be and they could start to overlap. It’s also important to remember that if you are facing the camera anything you draw will be seen in reverse on the image. With this technique if the artist stays in one place whilst drawing you will be able to see them, although any part of them that moved will be blurred. If the artist moves around whilst creating the image they will appear semi transparent or maybe even invisible. If the artist stands still in several different places whilst creating the image the artist will appear semi transparently in each of these places. It’s important to remember that anywhere the light moves will come out in the photo, kind of like an etch–a –sketch, you need to plan the drawing accordingly. Of course if you’re using a torch you can always switch it off whilst you reposition it. If you want to get a clearer image you may want to try using a laser pen, (although be sure to observe the relevant safety guidelines, avoiding shining the laser into people’s eyes etc.) For best results when using the laser pen aim the camera not at the artist but at a wall or surface, and then have the artist draw the image on the wall. The image will appear in the photo as if it was neon light. Expanding on the idea: As you get more confident with creating these images you can become more creative, perhaps have models standing very still for the photo whilst an artist draws things over them. Be creative; perhaps make it appear as if your models are shooting lightning bolts, or label them with their name. If you want the figures in the image to stand out you can do this by “colouring them in” with a torch, simply do this by shining the torch at them from a fairly close distance and covering them with the light. The images I’ve included are simple ones that you could easily attempt to recreate, however searching Light Painting on the internet will bring up some extremely impressive images that demonstrate the true potential of this technique. The more you try this the more you’ll learn
about how light works and soon you’ll be developing your own techniques and
creative uses for light painting. Have fun.
Copyright © 2000-2020 Hints and Things cannot be held responsible for any information given on this site nor do they necessarily agree with, or endorse, the views given by third parties. |