|
|||
|
|||
|
|
|||
|
|||
Hints and Things does not use any 1st Party cookies - more information .
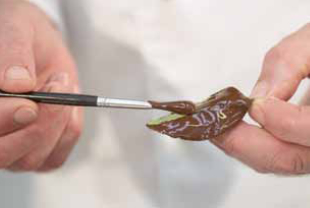
How to Make Chocolate Leaves These are great fun to make for adults and children and they make superb decorations for chocolates or desserts. Real leaves are used so please make sure they are edible. Small leaves can be fixed to individual chocolates and larger leaves can be mixed in with chocolates on a serving plate. This looks particularly attractive if you vary the colours of the leaves. You could, for example, have a stunning array of coloured white-chocolate autumn leaves. 1. Using a soft, clean paintbrush, spread a layer of tempered chocolate (see below) on the underside of a clean, fresh, dry leaf. The layer should be thick enough to allow it to come away from the leaf without cracking, when dry. Using the underside of the leaf will produce clearer veins on your chocolate leaf.
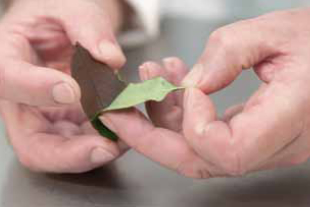
2. Leave to set for about 20 minutes, then gently peel away the real leaf from the chocolate.
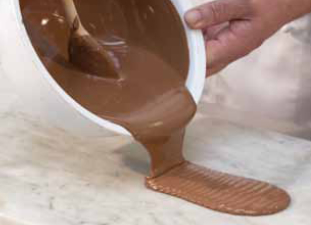
This is the classic way of tempering chocolate but it is hardly used today, as it is very time consuming and requires a marble bench. It is, however, the most spectacular way of tempering and is used in demonstrations for that reason. 1. Melt the quantity of chocolate you need. Pour approximately two thirds of the melted chocolate onto the marble.
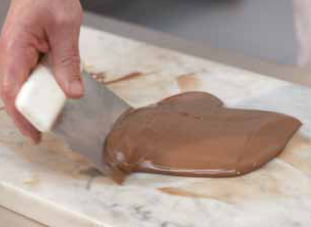
2. Use a large, flexible scraper (available from DIY shops) to repeatedly pull the chocolate together and then spread it out. This causes the chocolate to cool quickly and to thicken. The chocolate now contains a number of 'seed' crystals. As the chocolate temperature drops, more crystals form. You want to get plain chocolate to about 29°C - check this by putting a tiny piece of the chocolate on your bottom lip. If it feels cool, it should be ready.
3. Once you reach the required temperature, quickly stir in the remaining third of the melted chocolate. This will melt or stabilize any unstable crystals. If this doesn’t work, it is possible that there are not enough 'seed' crystals in the first two thirds (for example, if the chocolate hasn’t been cooled enough) or the remaining third is too hot. Unfortunately, should this be the case you will have to start all over again. When tempered, transfer the chocolate to a bowl ready for use.
Copyright © 2000-2020 Hints and Things cannot be held responsible for any information given on this site nor do they necessarily agree with, or endorse, the views given by third parties. |